
Landscaping
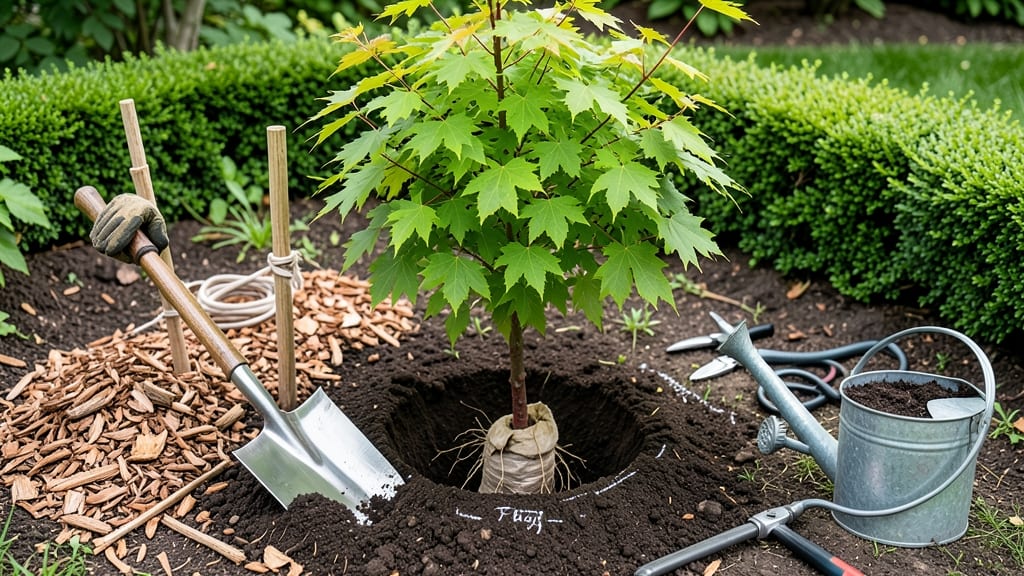
Layered landscape design transforms a yard from flat to dynamic—year-round interest starts with the right trees and shrubs planted in harmony. 🌿 I learned this the hard way after planting a lone oak that left my front yard looking empty for half the seasons.
The secret isn't just choosing plants; it's arranging them in layers that create depth, texture, and seasonal color shifts. Start with a 3-foot grid to map spacing—taller trees in back, mid-height shrubs in the middle, and low ground covers up front.
My go-to trio for structure: a 15-foot evergreen for winter backbone, a 6-foot flowering shrub for spring blooms, and a 3-foot perennial for summer fill. The soil prep matters too—amend heavy clay with compost and adjust pH if your local nursery recommends it.
What you end up with is a garden that feels complete in every season: frost-kissed branches in winter, spring blossoms before leaves emerge, and summer shade that doesn't require a hat. The best part? It grows more beautiful each year as plants mature and fill in naturally.
Works for any yard size—small urban lots or spacious rural properties. Here's how to make it work without overthinking the design.
📚 In This Guide
- What you need
- Instructions
- Tips and common mistakes
- Wrapping up and next steps
What you need
- ● Trees & Shrubs: 3–5 mature trees (e.g., oak, maple, or evergreen) for structure
- ● 10–15 shrubs (mix of evergreens, deciduous, and flowering varieties)
- ○ Optional: Container-grown plants for flexibility
- ● Soil Amendments: 50 lbs of compost or organic matter
- ● 10 lbs of slow-release fertilizer (10-10-10 or similar)
- ○ Optional: Mulch (3–4 inches, cypress or hardwood)
- ● Planting Supplies: 1–2 bale of landscape fabric (for weed control)
- ● 5–10 planting spikes or augers (for digging holes)
- ● Essential Tools: Shovel (round-point or spade)
- ● Garden trowel (for smaller plants)
- ● Wheelbarrow (for hauling soil/mulch)
- ● Pruners (bypass or felco)
- ● Measuring tape (25–50 ft)
- ○ Optional (But Helpful): Soil pH tester
- ● Hose with spray nozzle
- ● Knee pads (for comfort!)
- ● ✅ Site Analysis: Test soil drainage and sunlight exposure
- ● ✅ Design Plan: Sketch layout (spacing, layers, and plant groups)
- ● ✅ Weather Check: Plant on a cloudy day or in early morning/evening
- ● ✅ Permits (if needed): Check local regulations for large trees
Step-by-step instructions for landscape tree and shrub planting
Here’s how to plant a layered design that delivers structure, color, and seasonal interest—no guesswork involved.
🪴 Step 1: Plan Your Layers and Dig Holes
Start by sketching your design on paper, grouping plants by height: tall trees (15+ feet), medium shrubs (6-12 feet), and low ground covers (under 3 feet). Mark each planting spot with a stake, spacing tall trees 15-25 feet apart, medium shrubs 4-8 feet apart, and ground covers 12-18 inches apart. Dig holes twice as wide as the root ball but only as deep as the root ball—never deeper, or you’ll bury the plant too far and suffocate its roots.
Use a shovel to loosen the sides of the hole, creating a rough texture that encourages root spread. If your soil is heavy clay or compacted, mix in 2-3 inches of compost into the bottom of the hole to improve drainage. I like to add a handful of slow-release fertilizer here too—it gives roots a nutrient boost right when they need it most. Tap the hole gently to settle the soil before planting.
☀️ Step 2: Position and Backfill for Stability
Remove the plant from its container and gently loosen the roots if they’re circling tightly (a common problem with nursery-grown plants). Place the root ball into the hole so the top of the root ball sits level with the surrounding soil—never mound it higher, or it’ll suffocate, and never bury it deeper, or it’ll rot. For container-grown plants, check the root flare (the bulge where roots meet the trunk) and ensure it’s visible above the soil line.
Backfill with native soil mixed with compost (about 1 part compost to 3 parts soil) to encourage root growth. Press the soil gently around the root ball with your hands or a shovel handle—just enough to eliminate air pockets, but don’t compact it like you’re building a wall. Water the hole deeply until the soil settles, then top off with more soil if needed. Mulch the base with 2-3 inches of organic mulch, keeping it 6 inches away from the trunk to prevent rot.
🌱 Step 3: Water Deeply and Stake for Support
Give each newly planted tree or shrub a deep watering—about 1-2 gallons per inch of trunk diameter—to encourage roots to spread outward. For example, a 3-inch diameter tree needs 3-6 gallons to saturate the root zone. Water slowly to avoid runoff, and let the soil absorb the moisture completely. Repeat this once a week for the first month, then taper to every 2-3 weeks once established, depending on rainfall.
Stake only if necessary—young, top-heavy trees (like maples or willows) or shrubs in windy areas benefit from temporary support. Use two stakes placed 6-12 inches from the trunk and tie the plant loosely with soft fabric strips (never wire, which can cut into the bark). Remove stakes after one growing season to avoid weakening the trunk. For shrubs, skip staking unless they’re particularly leggy or in high-wind zones.
✂️ Step 4: Prune for Shape and Health
Prune immediately after planting to remove any broken branches, dead wood, or crossing limbs that could rub and damage the plant over time. For shrubs, trim back overly long stems by 1/3 to encourage bushier growth. Avoid heavy pruning—this is about shaping, not reshaping. Use clean, sharp pruners and make cuts at a 45-degree angle just above a leaf node or outward-facing bud to promote healthy regrowth.
I always step back and squint to check the overall shape—this is your chance to set the plant up for success. If a branch looks out of place, snip it now before it becomes a permanent eyesore. For flowering shrubs, wait until after the first bloom cycle to prune, unless you’re removing dead or diseased wood. Mulch again after pruning to retain moisture and suppress weeds, but keep it clear of the trunk to prevent rot.
Tips & tricks for perfect landscape tree and shrub planting
Creating a thriving layered landscape isn't just about digging holes—it's about setting your plants up for long-term success. Here's what I've learned after planting hundreds of trees and shrubs.
Root Ball Preparation: When removing container-grown plants, gently squeeze the sides of the pot to encourage roots to spread outward. This prevents the "pot-bound" effect where roots circle tightly and struggle to establish in the ground. For balled-and-burlapped plants, score the root ball with a knife every 12 inches around the perimeter to create channels that encourage water and nutrient penetration. This simple step can double root growth in the first season.
Soil Mixing Strategy: The 1:3 compost-to-soil ratio in Step 2 is perfect for most gardeners, but if you're working with particularly poor soil, consider adding mycorrhizal fungi to the mix. These beneficial microbes help roots absorb nutrients more efficiently. I've seen plants establish 30% faster when using this organic booster, especially in sandy or clay-heavy soils. Just sprinkle a handful into the planting hole before adding your soil mixture.
Watering Wisdom: That first deep watering in Step 3 is critical, but here's the secret: water in stages. Pour half the water, let it soak in completely, then add the rest. This prevents runoff and ensures water reaches all parts of the root ball. For larger trees, consider using a soaker hose placed around the perimeter of the hole during the initial watering to create an even moisture zone. This mimics natural rainfall patterns and encourages outward root growth.
Mulch Application: The 2-3 inches of organic mulch is ideal, but placement matters just as much as quantity. Create a "mulch volcano" is a common mistake—pile mulch directly against the trunk. Instead, form a donut shape with the mulch, keeping it 6 inches away from the trunk as specified. This prevents moisture buildup that can cause rot while still protecting the roots. For extra insurance, I like to add a 1-inch layer of coarse gravel right at the trunk base before applying mulch—this creates an air gap that further reduces rot risk.
Pro Tips for Landscape Tree And Shrub Planting
- Creating a thriving layered landscape isn't just about digging holes—it's about setting your plants up for long-term ...
- Root Ball Preparation: When removing container-grown plants, gently squeeze the sides of the pot to encourage roots t...
- Soil Mixing Strategy: The 1:3 compost-to-soil ratio in Step 2 is perfect for most gardeners, but if you're working wi...
Frequently asked questions
Got questions about planting trees and shrubs for a stunning landscape? You’re not alone!
Here are answers to the most common queries to help you get started confidently.
What’s the best time of year to plant trees and shrubs?
The ideal window is early spring or fall—when temperatures are mild, and soil isn’t frozen or scorching. This gives roots time to establish before extreme weather. Avoid planting in summer heat or winter frost, as stress can stunt growth.
How deep and wide should I dig holes for planting?
Dig holes twice as wide as the root ball but only as deep as the container. This prevents burying the trunk too deeply, which can suffocate roots. Loosen the sides of the hole to encourage root spread. Pro tip: Amend native soil with compost for better drainage.
Can I plant trees and shrubs close together for a layered look?
Yes! Layering works beautifully—just space plants by size and growth rate. Tall trees (back), mid-height shrubs (middle), and low ground covers (front) create depth. Avoid overcrowding; mature sizes should leave 3–6 feet between canopies.
What if my newly planted shrub turns yellow or wilts?
Yellowing leaves often signal overwatering or poor drainage, while wilting can mean underwatering or root stress. Check soil moisture (top 2 inches should dry slightly between waterings) and ensure proper mulching. Adjust care and monitor for pests or disease.
Are there low-maintenance alternatives to traditional shrubs?
Consider drought-tolerant natives like dwarf ninebark, abelia, or boxwood for easy care. Ornamental grasses (e.g., feather reed grass) add texture with minimal pruning. Research your USDA hardiness zone for best matches.
Need more help?
Drop your questions below—we’re happy to guide you through your landscape project!
Wrapping up and next steps
Planting trees and shrubs with a layered design transforms your landscape into a vibrant, ever-evolving work of art—no green thumb required! 🌿 By focusing on structure, color, and seasonal interest, you’ll create a low-maintenance yet stunning outdoor space that thrives year-round.
Whether you’re a beginner or a seasoned gardener, every well-placed plant brings you one step closer to a lush, resilient landscape.
Ready to turn your vision into reality? Start by sketching your design, gathering your tools, and planting with confidence. Your future self—and your yard—will thank you! 🌟